Thursday, March 29, 2012

You're Invited!

For a few moments, my sister and I thought of how much fun it would be to make wedding invitations. There are so many unique and interesting invitations choices these days for brides. Many talented brides are choosing to create their own masterpiece of an invitation for their wedding. My sister and I thought for only a moment, then we decided to use the time just as a fun way to create. Here are some of the designs I came up with for an autumn wedding:
Going with ORANGE and a leaf theme here... All of thee invites were made from scraps I have on hand.
This orange card is a basic orange cardstock with gold metallic background for the gold stamped leaf which is on yellow cardstock. A golden yellow organza ribbon was used. The card is sealed with foil leaf stickers.

This one did not photograph as well as I had hoped. An organza ribbon holds a gold stamped leaf design (on gold yellow cardstock, atop orange cardstock).

Just a basic invite with a brown cardstock backing. The leaves are stamped over the invitation in gold ink.

This invitation was printed first, then stamped with orange ink using a small leaf stamp. The off white cardstock was then glued to the brown cardstock backing. This is so easy to do.


Torn paper invitation. The invitation info was printed on a lightweight paper, then torn. I used the orange and a gold shimmer paper for backgrounds, punched holes in the top part and tied in a paprika colored organza ribbon.

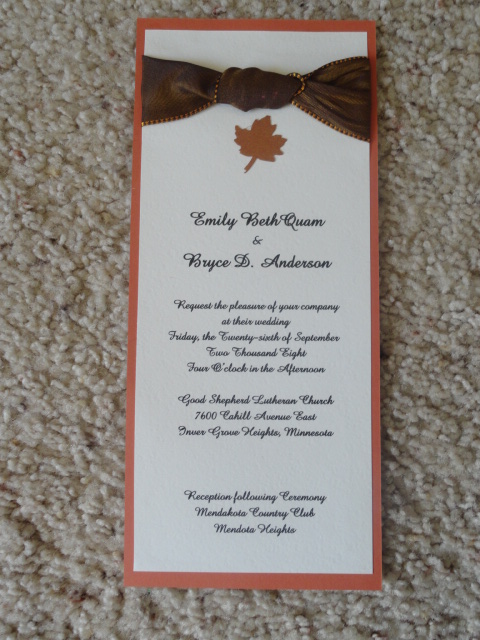
The above photos show colors of brown and off white. The invite is printed in brown and then the bronze ink is used to stamp on the maple leaf. I think the layout makes this one dramatic.

Using a textured ribbon....

The brown satin ribbon is edged with gold threading, making this knot stand out on this card.

I used stamps to create this card. The dove is embossed with sparkle embossing ink. I added a gemstone between peace and joy to carry on with the sparkle theme. Gold shimmer cardstock is used as backing and an aqua ink is used for the design and words.


My sister and I worked on this one together. I added the wire embelishment to "jazz" it up a bit. Stampin' Up stamps were used for the wordage background and the L O V E. Gold ink on off white cardstock, and gold Stampin Up cardstock were used.


Orange textured shimmer cardstock with bronze shimmer cardstock, black ink and bronze gemstones. I'd use this for a card for birthdays, friendship, get well, etc.

Background was stamped with subtle autumn colors of ink, then the invitation was glued on top, I used a paper punch to punch out leaves in shimmer tones of reds and bronze.


Ivory cardstock, a gold foil pattern cardstock, and ivory paper for the invite words.

Basic design makes this invitation look clean. Orange cardstock, brown satin ribbon, ivory cardstock with brown print.

This pocket fold design is a popular one where the directions and rsvp, etc. can be tucked into a pocket. I used a printed foil pattern paper in champagne on ivory for this invitation. Two different patterns in the same colors make the card interesting. (Yes, it is a duo sided paper.) I like the elegance of this card.

I could go on and on....I made 26 different cards - which I believe is a record for me! - in three hours time.
It was a fun day of sharing stories and exploring creativity with my sister.

Saturday, March 24, 2012

Spring Hath Sprung in Minnesota

The end of March is near. It has been too long since my last post. I have to admit that I have been out enjoying this awesome early spring. Our temperatures here have been in the 70's. May like weather in March. Wow. I am loving it! Today, I am posting some of my simple cards I made with leftover scraps and unused stickers.

My daughter, Cherie, let me play with her Cuddlebug. I had so much fun embossing scrap papers! I ended up using a pretty pink piece for my background here. I cut out a floral glitter flowery piece from scrap paper and backed it to look like a framed piece. Easy, simple, inexpensive....well, let's go so far as to say FREE!


Again, leftover scrap papers, added some ribbon and a slide. The phrase is a stick on that I had "leftover".


A series of three cards, using a large scrap of paisley paper. Simple, quick, and fun!

I had some textured scraps that I wanted to use up. I just can't throw this stuff out. I figure I can always find a use for scraps. The grey-silver card needed some pizazz, so I added the pink phrase sticker.


Two cards using black scraps. The black background does not help the presentation of the top card..... I used black shimmery cardstock for the card, adding the beige and black printed paper for background. The pink paper was one of my Cuddlebug embossing pieces, then I used stick on sequin and cloth flowers.

The butterfly card, is black and white. I had the butterfly and framed piece, then designed using scraps around that. Fun!
Tea time! So now I am .....................................................................Sneaking off....................

Wednesday, February 15, 2012

Sneaking out of the Northwoods and into Europe! 

Last July, my daughter, Cherie, and I went on an adventure to Europe. We had a marvelous time traveling together. We visited London, Amsterdam, Lucern, & Paris. We had a super time in Switzerland, Germany, and the United Kingdom. Oh my, what an adventure we had!
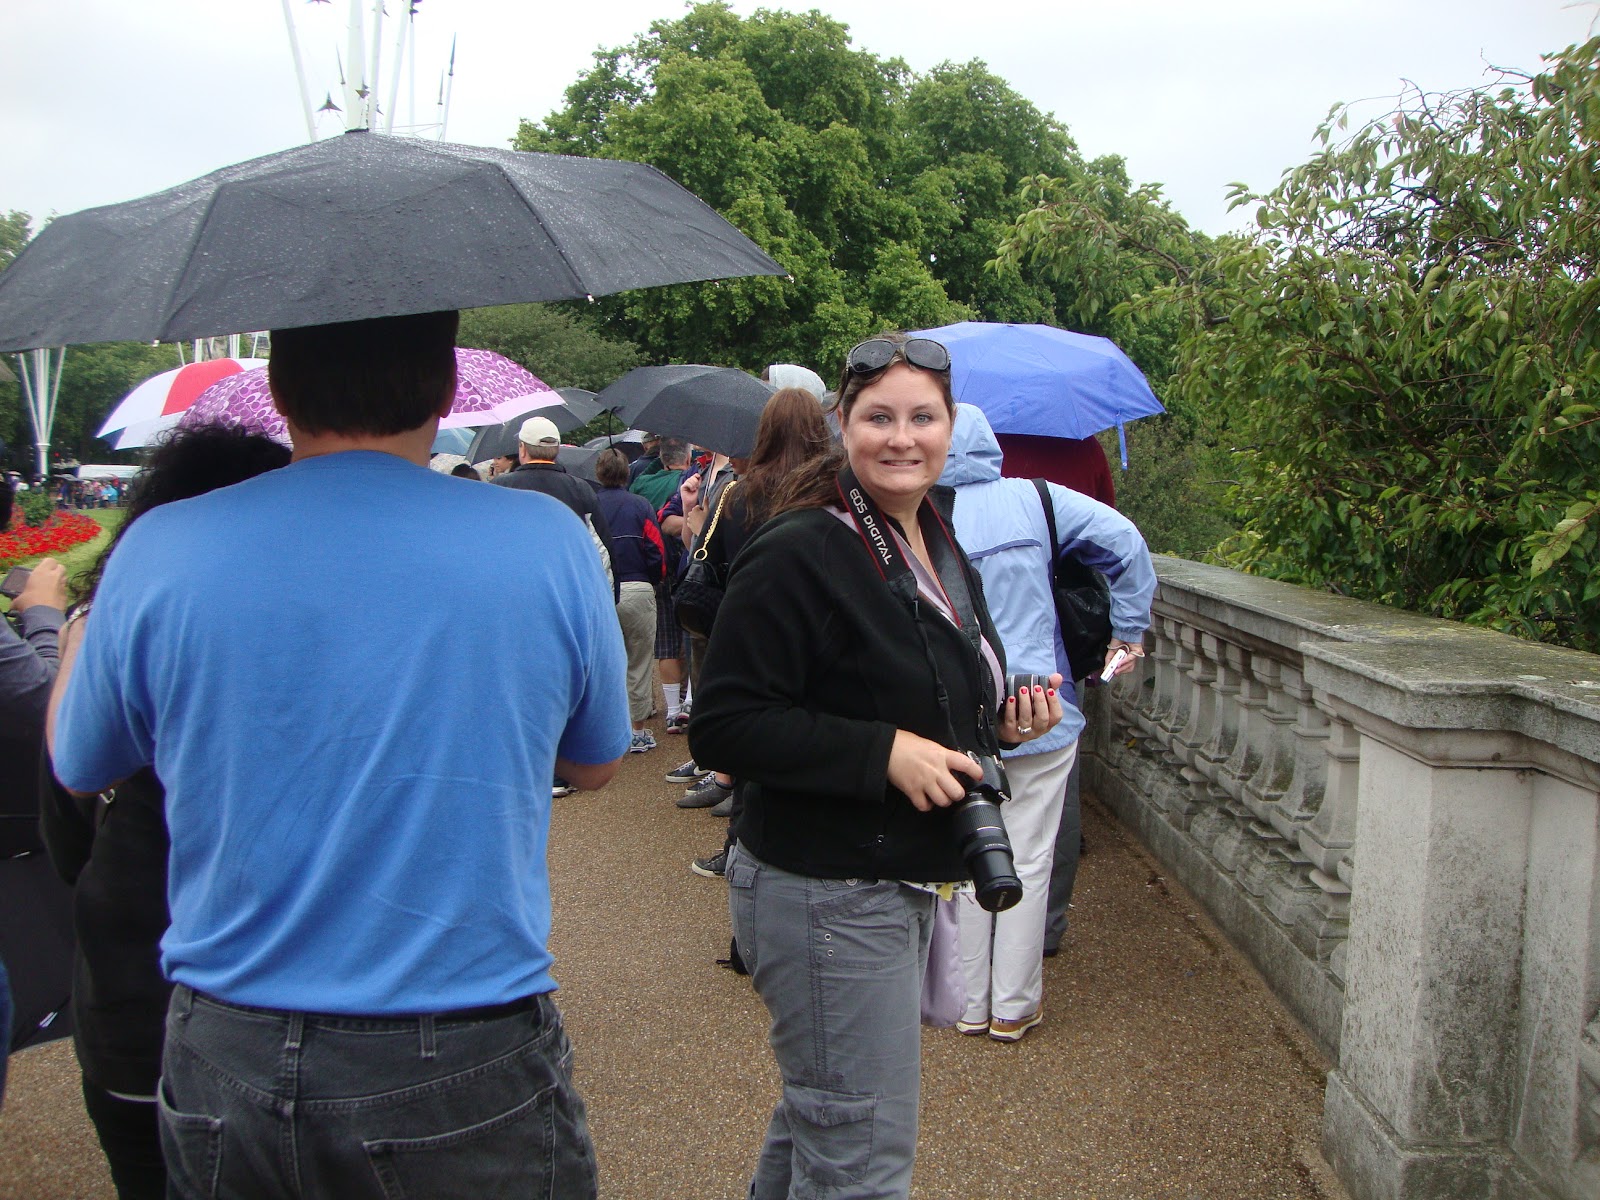
 We encountered a surprise! It was raining, and they marched right past us on their way back to barracks.

At night, the Eiffel Tower glitters with a zillion lights! It does not show its glory in my photographs. You will have to go see it for yourself!


I am an Aquarius. I love the water. So, we took a boat cruises to see some of the sights. So many lovely sights. I took tons of photos.....now to organize them into a scrapbook! That will be my next project. Right after I make my niece's Bridal shower invites!                                Sneaking off.................


The trees outside were frosted white this morning. So elegant! So pretty! And, I left without my camera. Silly me.....

I have been meaning to post some of the cards I am having fun making. I have yet so many more to do. I found myself "empty handed" at work the other day. No card to present to the Birthday Girl. So, I am on a mission to fill up my file at work with cards to present to my co-workers on such important occasions. Here is my start;

My work area is literally 1/2 of what it used to be. My storage is down to 1/2 as well. Makes creating a bit more of a project.... but on the other hand, I am happy to share my craft room with my lovely daughter. She will be here for only another 3 months or so.... then she will be moving to Hawaii. Poor thing. I guess I will have to visit her as often as I can when she is in Hawaii. I do not want her to be sitting around doing nothing.....  Oh, what a lucky girl she is!
 For my 59th birthday, I did something daring! Oh yes, I had my pedi done sparkly blue polish! How brave is that?
 I have two nieces getting married in 2012. I just made the invitations for the Family Bridal Shower. Each one is  bit different, with colors, etc. This was a fun project, thanks to my daughter, Cherie, who guides me through the use of my Cricut.
Now to think of the decorations I can make for the event! 
                                                                                        Sneaking off..................


Saturday, February 4, 2012


Our Minnesota weather has been so mild thus far, that I have not spent much time blogging. I have done a bit of card making in my craft room though on those days when the ice froze the walkways and my body went into hibernation mode.

I have two lovely nieces getting married in 2012. One is in May, and the other in July. They are sisters. I have the honor of addressing the invitations. I am also hosting a Bridal Shower for each niece. I just finished making the invitations for the first bride's shower, to be held a month from now!

This is a photo of my Cricut work space area.......


I used Sei ' white elegance' cardstock in pearl strand for the background of the dresses. I used Sei white elegance in Tiara, for the dress layer on some of the cards, and used 'doodlebug design', lily white serenade cardstock for some of the other dress layers on cards. I also utilized some of the white textured design scraps I had for the dress layer on a few cards. So, as you can see, each of the cards is different in more ways than one! The dress was bonded onto a 5-1/2 X 4-1/2 inch rectangle of assorted plain colored cardstock. (Pink, green, turquiose, aqua...) The curly frame is from Cricut, Formal Occasion cartridge.I cut it in 4-3/4 inch size, using assorted plain colors, and a K & Company paper (teal blue swiss dot). The "You're Invited" is cut from my daughter's Cricut cartridge, "Sophisticated". I found the 2 inch size worked best on the plain colored cardstock. The back (reverse side) was left plain so that I could add the information on text weight ivory paper. I mailed the invites in plain ivory or white envelopes. I must say, my niece was pleased! I can't wait for the fun we will have at her shower!
                                                                                                                   Sneaking off.......

Wednesday, January 18, 2012

I belong to the most wonderfully fun Tea Group, Visions in Red. When I turned 50, my girlfriends thought we should become "Red Hatters", hence the name, Visions in Red. We soon found out that the Red Hat movement was not for us. We lean more towards the Victorian Tea experience. Our belief is that one should take tea with friends, indulging in special treats & friendship. This is a process NOT to be rushed. So, we enjoy our monthly tea events, dressing up, and wearing our special going to tea hats. In fact, we have only ONE rule: You must wear a HAT to tea! We have each taken the name of a favorite grandmother to use as our special tea name. I am Queen Mum Hannah. Queen Mum was dubbed to me, as I am the founder of the tea group. My lovely sister-in-law, Nettie Princess of Etiquette, has graciously organized our February tea event at one of our favorite tea houses. This is a Valentine Tea, to which we are to bring a valentine card to exchange. I am posting a few of the cards I have made. I only need to bring one to tea, but I can't just stop at one when I am in my craft room! Now that I look at these cards, I may have to work on some more....maybe more of a Victorian style card with ribbons, lace, and buttons. But I still like these.      

I used a pastel pink cardstock from Stampin Up for my base layer. The white strip is a lovely sparkle paper, which obviously did not photograph well for me. I used my Cricut cartridge, Home Decor, to cut the pink, brown, and white hearts. The dark pink heart is made from Bazzill Basics paper in a pink swiss dot. (also doesn't show in the photo.) I utilized some old stickers I had in my sticker box for the rest, and then my daughter gave me some of her Glam Rocks hearts to adhere.
I am going to have to write down the names of the papers and their colors for my next project. I am still new to this, so please bear with me. Can you teach an Old Dog new tricks?


I found this fun tea cup ribbon at Michaels. It is part of their Celebrate It line. I bought the ribbon and decided to create this card around it. The backing for this card is the Stampin' Up light pink cardstock. I made the cards square to use up my pink Archiver's square envelopes. Chocolate Brown Stampin' Up cardstock layers atop the pink base. I then used the sparkly white cardstock for the third square layer. To soften the look of the card, I used a light pink handmade fiber paper from Dancing Colors. This type of paper was big about 20 years ago, and I was actually into making my own paper back then....which is very messy to do! Atop this handmade paper, I put my cupcake. Using my Cricut, Home Decor cartridge, I cut out the cupcake in teh chocolate brown, then cut it out in the lovely sparkly white paper that doesn't photograph well. I glued the white cut out over the chocolate brown base to make it look like a muffin paper. To add some pop to the chocolate cupcake top, I outlined it in Cinnamon Stickles. I taped down my teacup ribbon, and then glued the brown and white layered cardstock squares  to the pink square. I then attached my Home Decor cartridge hearts. The chocolate brown FRIEND was cut from my Cricut Sentimentals cartridge. Needing more glam, I attached three adhesive backed heart rhinestones from the Recollections line. I like sparkle!


To end my Valentine cardmaking day, I found an old set of red & black stickers in my old sticker bin. Waste not, want not. I decided to create a red & black card. Using Stampin' Up red and black cardstock. I made a standard 4-3/4 X 6-3/4 card for a 5X7 envelope. The ladybug sticker was already layered onto the black & white tag. I just added a bit of white ribbon. The red hearts were cut from my Emagination punch. The little silver stickers : top one says Girlfriend, and the second one says You Are Special. I added the Recollections adhesive backed heart rhinestones for dazzle, and added the key and heart sticker, which is from my old sticker collection box. I believe these old stickers were a Mark Richards collection.
The red cardstock base is attached to a pre-made card. I added an extra red heart with rhinestone to the card in lieu of a postage stamp. This card will be hand delivered.                    Sneaking off.....

Monday, January 16, 2012

Happy New Year! 
2012
I am working on updating my card inventory for the New Year. I have decided that with my new Cricut and the lovely cartridges I got for Christmas, I will be able to make my own cards. I started out with making cards without my Cricut. My next plan is to use the Cricut to see what amazing things I can do. Here are a few of my non-Cricut made cards;

I like the yummy color combinations of pink and brown. I made this card with a soft pink cardstock, chocolate brown cardstock, ivory cardstock, and a brown and white swiss dot cardstock. I stamped the "party hearty!" on a piece of ivory cardstock using chocolate brown ink. I hand cut the cupcakes and used my utility knife to cut the slats in the bottom of the cupcake to make it look like the accordian cupcake papers. The frosting is the same pink cardstock, which I adhered over the brown cutouts using a 1/2 inch glue dot on each. I added pink beads for sprinkles on the cupcakes. I put a pink textured ribbon and tied a knot, cutting the ends to look like a bow. I glued this brown card piece onto the pink cardstock then adhered it to a white pre-made card.

On this Valentine's Day card, I used pink cardstock with a shimmery pink hart pattern paper. The pre-made sticker with it's little red heart jewel rests on black cardstock over a black and gold swirl ribbon.


I am using up my Stampin' Up cardstock. Here I used a brown cardstock, layering on top a soft pink cardstock. I put a brown and pink pattern piece I had in my "leftovers" file. I then put down a pink ribbon. Over the ribbon, I layered brown cardstock with green piece to which I stamped "find joy in the little things". I then stitched ivory white stitching on the top and down the right edge about halfway. I layered a piece of the brown with ivory white. I stamped three green stems and two flowers on this white piece. I stamped a third flower on another piece of the ivory white cardstock, cutting it out and pasting it at the end of the stem to give a 3-D look. Over this, I put down a pink ribbon. I glued this work piece to the card, overlaying it on the brown and green piece. I then tied and glued a little brown bow onto the floral piece. Once dried, I glued it all to an off white pre-made card.

I really enjoy making cards and I do not duplicate my creations. I am thinking maybe with the Cricut I can make up some multiples. This may be the year to make some changes. I love to give cards as gifts, and my friends tell me they really appreciate receiving them!    
                                                                                                             Sneaking off.............